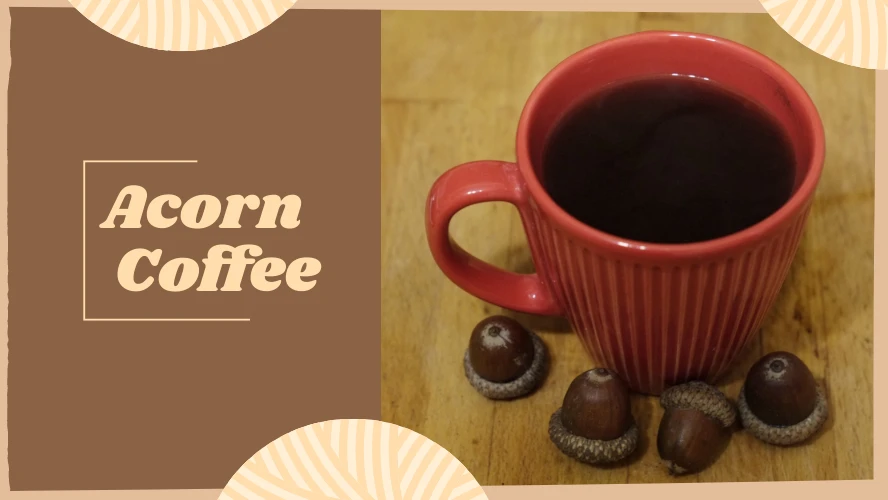
How to Make Homemade Acorn Coffee
When I think about acorn coffee, I think of its earthy, nutty flavor and its wonderful aroma when being brewed. It’s perfect for a lazy Sunday morning spent gazing out at your yard while sipping the nectar of the oaks.
And making coffee from acorns is more common than you might think. In fact, it can be an excellent coffee substitute for people who are sensitive to caffeine. Even coffee lovers can still enjoy the novelty of acorn coffee.
That’s precisely why we’re sharing a simple acorn coffee recipe to try at home. But there’s more; I will also give you a method to do it in case your acorns are bitter.
Is Acorn Coffee Safe to Drink?
Prioritizing safety is essential, especially with unique beverages like acorn coffee. This drink can be enjoyed safely when properly prepared. If the coffee tastes extremely bitter, it may indicate high tannin levels in the acorns, which can be harmful.
Our preparation guide for acorn coffee addresses this concern by outlining methods to reduce tannin content, ensuring a safer and more pleasant experience.
How Can the Taste of Acorn Coffee Be Described?
Before we start with the preparation, let me try to describe the flavor. Nutty and earthy are the best adjectives I can think of when describing the taste of acorn coffee. However, it is challenging to explain this flavor accurately. Experiencing it is the only way to understand what it tastes like.
To avoid misunderstandings, I must also mention that acorn coffee doesn’t taste like regular coffee. They are such different beverages with distinct tastes that comparing them is almost impossible.
Ingredients and Tools Needed to Prepare Acorn Coffee
- Acorns: The amount isn’t very important since you can make as much or as little coffee as you like. It’s better to make a small amount for the first batch because some work is involved, and more nuts mean more effort.
- Pot and water: To boil the acorns.
- Knife: This is needed to shell and clean the acorns. Using a serrated knife is better because acorns can be slippery.
- Strainer: After boiling, it will help separate the liquid from the nuts.
- Coffee grinder or blender: You will need it to grind the acorns into a coarse powder.
- Oven: An oven is needed to roast the acorns.
Things to Consider Before Making the Coffee
Preparing acorn coffee is relatively simple, but you should be aware of some things beforehand.
- Time: In the first place, the recipe below will take some time, especially when it’s time to dry the acorns after boiling them. That will take a whole day, so be aware that you will only finish the coffee the following day.
- Quality: This should go without saying, but bad acorns won’t make good coffee. Inspect the acorns before doing anything with them, and discard any damaged nuts. Mold, fungus, and holes are some of the main signs to look for.
- Ripeness: If your acorns are a bit green, you can get excellent results by letting them ripen in a paper bag. It could take one to two weeks to get acorns suitable for coffee roasting.
Making Acorn Coffee (Method 1)
This first method is the fastest and most suitable for acorns that are not very bitter.
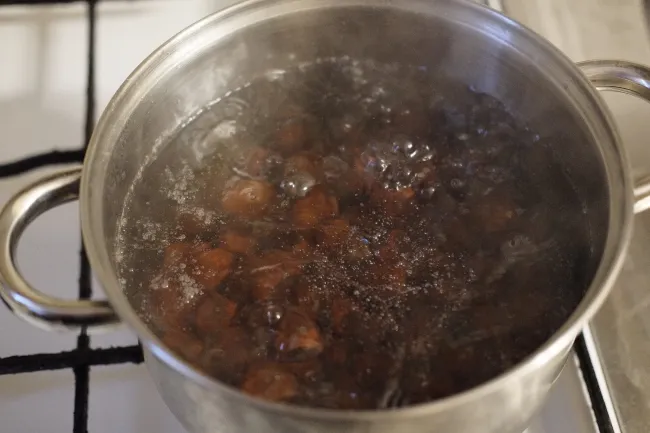
1. Boil the acorns
Give your acorns a good 30 minutes to boil. This will partially leach the tannins from acorns and make the shells easy to remove. However, this process will only remove some of the tannins.
2. Shell them
Before starting, wait a few minutes until your freshly boiled acorns have cooled down. This is the most time-consuming step of making acorn coffee. You’ll need to shell and peel the skin of your batch. They should come off quickly. At least it will be much easier to come off than before boiling. If some of the outer skin doesn’t want to come out, it’s not a big deal. They don’t have to be extremely clean. The remaining skin will come out if you boil them later (in step 5).
Cut each acorn in half and shell them. If the base is wide enough, place it on a hard, flat surface and hold the nut with your fingers. The acorn is softer after boiling, and the knife should go through it quickly. Here’s an image of how I did it:

But be very careful. Do not try this technique with raw acorns, as they are very slippery, and you may hurt yourself.
While at it, look at the inside of the nut and remove the ones that look very dark or rotten. The color of the good ones will still be a bit darker than a raw acorn due to the boiling.

While you are cutting them, you will notice a beautiful nutty smell. However, it does not remind the scent of other particular nuts; it’s a unique earthy autumn smell that spreads all over the house. It’s one of my favorite parts of making homemade acorn coffee.
3. Chop the acorns
You can use a knife to chop the acorns, but don’t overdo it. In my case, most of them broke when I was shelling them. I only had to cut a few of the halves into smaller pieces.
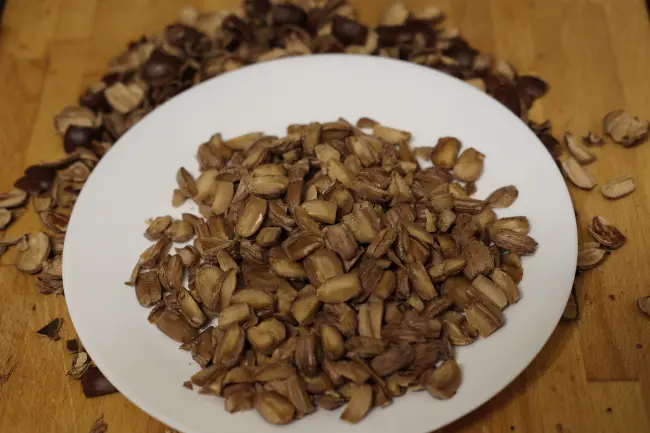
If you prefer a food processor, use the setting you would choose to chop up pecans for baking. It’s important to note that you are not yet making “grounds” at this point.
4. Boil for a second time (optional)
You can try a tiny bit of one of the nuts. You can boil your chopped-up pieces for a second round if you notice a strong bitter taste. The goal is to remove more of the tannins and, as a result, eliminate some more bitterness. This is purely a judgment call on your part.

Since this process removed some of the tannin content, that water will be bitter. So, it’s necessary to wash the acorn meat with a strainer.
5. Let the acorn meat dry
It’s time for drying. Spread your chopped pieces on a flat surface, leaving space between them to let air circulate. Ideally, you will want to wait 24 hours before moving on to the next step.
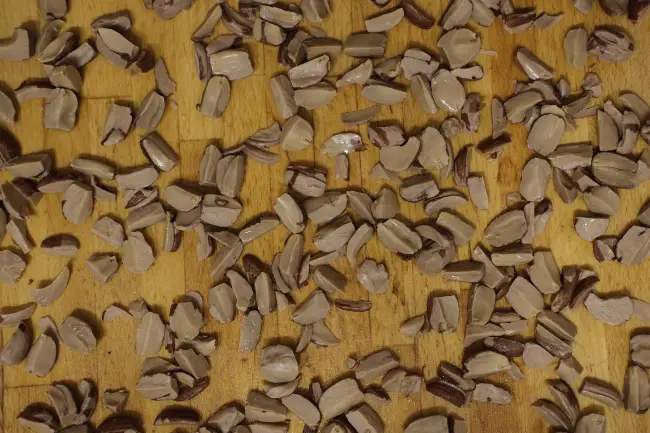
Keep the nuts in a dry place, away from insects.
6. Roast the acorn bits
When you get to the roasting stage, you’ll want to preheat your oven for around 20 minutes. You should be good with 400 degrees Fahrenheit (204 degrees Celcius).
Now, it’s time to spread your chopped acorns across a baking pan lined with baking paper. After that, place the chopped acorns in the oven for between 25 and 35 minutes at the same temperature. I like to put them on the lowest rack and turn on the heat from above to avoid burning them.

Be sure to watch and stir them a few times during the roasting process. It won’t take long for them to go from lightly toasted to completely burnt. The result below is a bit darker than usual because I left them for 35 minutes, but still good. However, it shouldn’t get darker than this. Some of the smaller ones got burnt, and I got rid of them.

7. Grind the roasted acorns
It’s finally time to turn those roasted acorns into beautiful grounds! Use a coarse grinding setting using either a hand-powered or electric coffee grinder.

8. Roasting the grounds (optional)
You can take things further and roast your ground for an extra toasty flavor. I usually do this step when they still have a light color. However, I did not need to do it this time, as my ground acorns came out of the oven with a dark brown color.
You must be careful during this step because it will burn much faster than before. When I do it, I leave it for a few minutes at 400°F until it darkens slightly.
9. Brew your acorn coffee
The moment to taste the fruits of my hard work has finally arrived! I’m generally just brewing acorn coffee like I would brew instant coffee. I added the spoons of coffee directly into the water and mixed. But feel free to experiment with a French press or a drip coffee maker.
One of the differences you will spot immediately is that acorn coffee needs slightly less water than regular coffee, because the flavor is far less potent.
If the general rule you follow for regular coffee is two tablespoons for every cup of water, switch it to four tablespoons when using roasted acorn coffee. In other words, try using the double amount you would typically use.
If you don’t want to double it right away, to play it safe, add a bit more and try it. Repeat until you reach your optimal taste.

Making Coffee out of Very Bitter Acorns (Method 2)
If your acorns are very bitter, the regular method I taught you above might not be your best option. A fast boil (step 1) and another optional boil at the end (step 4) may not be enough to remove all the tannins, which are the main reason for the bitterness.
If this is your situation, you should adequately leach your acorns in hot water and only then proceed to the recipe. It’s more time-consuming, but it’s completely worth it. After this process, let the acorns cool down, clean them, and follow the recipe above, excluding steps 1 and 4.
Experimenting with these two methods
For the sake of experimenting, I made acorn coffee following these two techniques. I used acorns from the same batch, and I even did it on the same day. It’s also important to mention that my acorns were not highly bitter. I would rate them a 6 in terms of bitterness (from 1 to 10).
These two methods may seem similar, but the result is quite different. The first method will retain a bit of bitterness, and the second will remove it entirely. Let’s go over the two types of acorn coffee I have prepared:
- Method 1 (simple boil): The flavor of acorns was there, including a bit of bitterness. This one was my second favorite. That’s not to say it wasn’t good. I just don’t enjoy the bitter flavor as much, even when it’s only a bit. Some sugar improved it, but I would need more than I usually use.
- Method 2 (leached acorns): The acorn flavor was more evident, and the bitterness was gone. This one is my favorite! The taste reminded me of the fantastic aroma I felt when cutting the acorns in half. No added sugar was necessary for this version. However, if you wish to add a little bit, brown sugar would be a good choice.
Final notes on this experiment
In the first place, you can safely assume that, when using method 1, the bitter your acorns are, the bitter your coffee will be.
If you are like me and don’t like bitter coffee (not even a bit), the second method is a better option. I only use the first method when I am sure I have a variety of acorns that taste good due to a low amount of tannins. If unsure, I try a bit of the nut and see if there is enough bitterness to make leaching necessary.
Pro Tip: Experiment with Different Tastes
When you make acorn coffee for the first time, I suggest following one of the methods mentioned above. In other words, have the real deal first, and if you don’t love it, experiment with additional flavors.
Some people like to add fresh cinnamon sprinkles or a minimal amount of vanilla extract directly into the grounds. But you can be creative and experiment with your favorite flavors to give your acorn coffee a unique flavor profile.
How to Store Your Acorn Coffee Grounds?
Storing your acorn coffee grounds is easy. Put them in an airtight container at room temperature. A jar or a resealable bag will do. You should also store them away from any sources of heat or light. That’s it!
Even though this coffee can last long in the right conditions, I suggest using it as soon as possible. The longer you wait, the more flavor your coffee will lose over time.
Savor the Acorn Coffee Experience
Making acorn coffee is a great way to add variety and something new to your daily cup of joe. On top of that, it doesn’t have caffeine, so it won’t leave you jittery as regular coffee will.
But it’s essential to remember that you shouldn’t look at acorn coffee as a complete substitute for regular coffee. It cannot fulfill that role, and you would probably be disappointed. Since it does not come from coffee beans or contain caffeine, it’s not considered real coffee. Nevertheless, it’s an entirely different beverage with unique characteristics and flavors, perfect for any time of the day.
I hope you like it, and who knows? Maybe you’ll love it enough to become a regular part of your coffee routine. Give it a try, and let’s see how it goes! Happy brewing!