Roasting Almonds: A Journey to Crunchy Perfection

Roasting almonds at home is more than just cooking. It’s an art form that turns these nutritious nuts into a sensory delight. The process is cost-effective compared to store-bought versions, and it allows you to personalize flavors to your taste.
I usually use two methods. Dry roasting in the oven enhances the almonds’ natural flavor and texture. On the other hand, oil roasting in a pan offers a richer taste and a slightly moist crunch. Both are simple and gratifying ways to elevate almonds into a culinary treat.
Let’s explore these techniques to bring the art of almond roasting into your kitchen.
Selecting Almonds for Roasting
Choosing the right almonds is crucial for achieving the perfect roast. The type and quality of almonds you start with can significantly impact the taste and texture of your final product. Here are some quick tips to get you started:
- Aim for raw: Opt for raw almonds as they retain the most natural oils and flavors, perfect for bringing out the best taste when toasted.
- Freshness matters: Fresh nuts are key. They should be plump, firm, and creamy white inside. If you’re dealing with unshelled almonds, look for smooth, unblemished shells as an indicator of freshness. Older nuts might appear dry and discolored.
- Avoid pre-salted varieties: Choose unsalted almonds for better control over flavor and seasoning.
Our guide on how to choose the best almonds offers many useful tips for those looking to perfect their selection.
Preparing Almonds for Roasting
Proper preparation is essential to achieving perfectly roasted almonds. Here are some helpful tips to start on the right foot:
- Rinsing: While most commercially packaged almonds are clean, giving them a quick check is a good practice. That’s especially true if they’ve been stored for a long time or bought in bulk. If you find any dirt or debris, rinse them under cold water using a colander. This step ensures that your almonds are pristine before roasting.
- Drying: Thorough drying is crucial, as moisture can lead to uneven roasting and less crisp results. After rinsing, pat the almonds dry using a towel or kitchen paper. Alternatively, for a more natural approach, spread them on a baking sheet to air dry for a few hours.
Should you soak almonds before roasting?
Soaking almonds before roasting isn’t necessary, but it is a preferred step for those seeking a milder flavor. Additionally, if your almonds are excessively dirty, soaking them for a few hours before rinsing and drying can be beneficial.
For more details on this optional step, our tutorial on how to soak almonds offers comprehensive guidance.
How to Roast Almonds in the Oven
Dry roasting almonds in the oven is a simple and convenient way to achieve perfectly roasted nuts. Here is the process I follow to achieve the best results:
1. Gather your tools and ingredients
A minimalist approach is effective here. You’ll need:
- A heavy-duty baking sheet for even heat distribution.
- Parchment paper to prevent sticking.
- Almonds, the stars of the show.
- An oven, your roasting arena.
2. Preheat the oven
Begin by preheating your oven to a gentle 325°F (163°C) for 20 minutes. This step is crucial as it ensures the almonds start toasting immediately upon entering, which is vital for achieving a robust crunch.
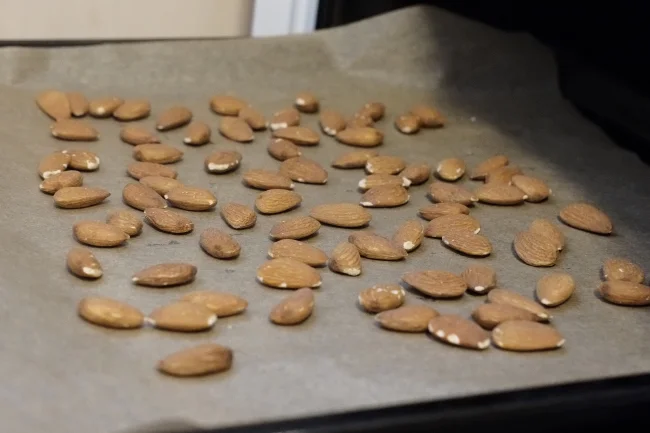
3. Arranging the almonds
Spread the almonds on your parchment-lined baking sheet in a single, uncrowded layer. Ensure they are spaced out evenly for consistent roasting. Halfway through the process, gently flip and shuffle the almonds to help each side brown uniformly.
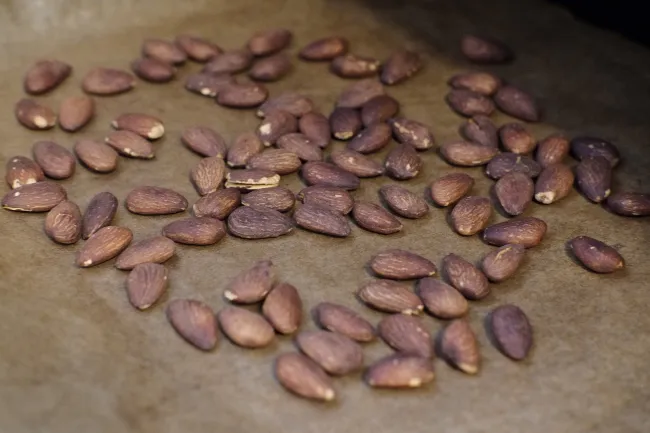
4. The roasting ritual
Place your prepared almonds in the oven. Roasting time ranges from 10-15 minutes, depending on your desired crunch. I personally find 14 minutes ideal for a darker and crunchier almond. Watch for a golden-brown color as a visual cue of doneness. Taste-testing at the 10-minute mark is a good strategy to find your ideal timing.
5. Cooling – The Final Step
Once roasted to your liking, remove the almonds from the baking sheet immediately. Since they are rich in oils, they continue to cook even after being removed from the oven. To prevent this after-roast cooking and over-browning, transfer them to a cool plate or surface.

How to Roast Almonds in a Pan
Pan roasting is an effective way to bring out unique flavors and textures in almonds. Here’s a simple guide for a delicious batch:
1. Gather your tools and ingredients.
A heavy-bottomed pan to ensure an even distribution of heat.
Almonds, your primary ingredient.
An oil that complements your flavor goals. Coconut, olive, or vegetable oil are all great choices. Extra virgin olive oil gives it a subtle flavor, while neutral oils like vegetable oil preserve the almonds’ inherent taste.
2. Select the right pan
Choose a pan that provides enough space for the almonds to lie in a single layer. A heavy-bottomed pan, such as a skillet, stainless steel, or nonstick, is ideal for even heat distribution. Such a pan will prevent burning and ensure a more consistent roast.
3. Coat the almonds in oil
In a separate bowl, gently mix the almonds with a hint of oil, about a teaspoon per half pound (227g) of nuts. This helps to evenly coat each almond, setting the stage for a uniform roast.
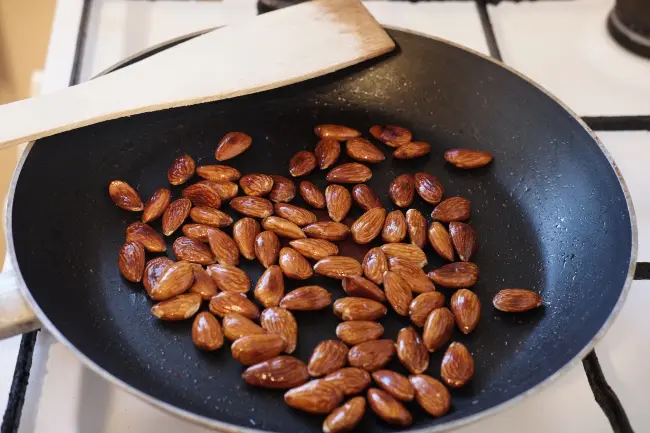
4. The roasting process
Preheat the pan gently, as the almond skins are delicate. Add the oiled almonds and keep your spatula ready. Regular stirring is crucial for even cooking and to prevent scorching. Be cautious with the heat to avoid oil splatters.

5. Time your roast
Over medium-high heat, toast the almonds until they reach a golden brown, typically within 5 to 7 minutes. Look for visual cues like a deep golden color and a nutty aroma to gauge doneness. I favor a 7-minute roast for a smokier flavor, but start checking at 5 minutes to tailor it to your preference.
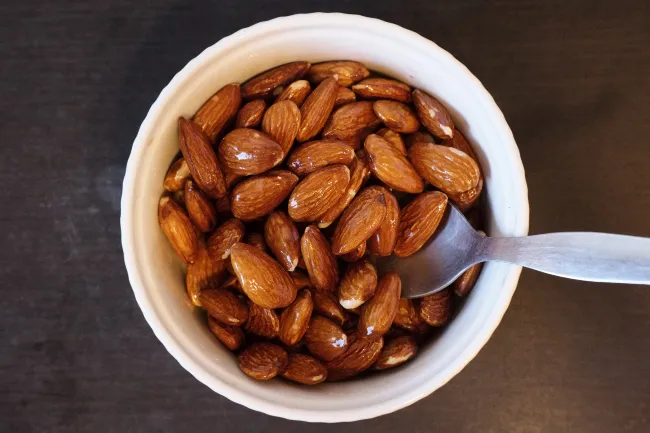
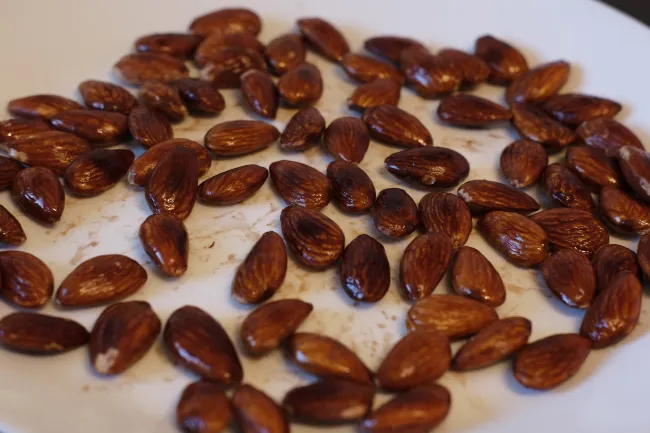
6. The cooling finale
Once roasted, transfer the almonds to a separate container to cool, spreading them out to allow air to circulate freely. This prevents further cooking and preserves their delightful crunch. For larger batches, a spacious surface like a baking sheet is ideal.
Comparing Almond Toasting Methods: Oven vs. Pan
Let’s compare the two methods to help you choose the right approach:
Oven advantages
- Lower-fat option: The oven allows for dry roasting, reducing the need for additional fats. This method is ideal for those looking to minimize added oils in their diet.
- Even roasting: The oven’s consistent and controlled heat cooks the almonds uniformly, ensuring each one is perfectly roasted.
- Efficient for bulk batches: The oven’s spacious interior makes it ideal for roasting large quantities at once.
- Convenience: Just set the temperature and timer, and let the oven do the rest. Additionally, cleaning is easier, and there is less mess.
- Extended shelf life: Dry-roasted almonds, free of added oils, stay fresh longer. They are the most suitable for storage.
Pan Advantages
- Hands-on control: Stovetop roasting offers immediate control over the heat. It allows for rapid adjustments and close monitoring.
- Flavor flexibility: Using oil in a pan creates opportunities to infuse the almonds with diverse flavors, like herbs or spices.
- Speedy solution: The stovetop heats up quickly, which reduces the overall roasting time. It’s perfect if you don’t have much time.
- Roast to taste: Direct heat and constant attention mean you can achieve your preferred roast level with precision.
- Do it anywhere: All you need is a pan and a heat source, making it ideal for roasting in various settings, from the comfort of your kitchen to camping trips.
I lean towards the oven method for its low-fat approach and ease of use. However, your best choice depends on your flavor preferences, available time, and cooking style.
Whether you choose the even and gentle roast of the oven or the pan’s direct heat, both methods promise a delightful adventure. Don’t hesitate to experiment with both to find your perfect match!

Pro Tips to Enhance Your Toasted Almonds
Enhance flavor and texture with these expert tips:
How to achieve extra crispy roasted almonds
For some people, almonds are never crispy enough. If you want to take that crispiness a step further, here are some things you can try:
- Complete dryness: Ensure the almonds are thoroughly dry before roasting. Moisture is the enemy of crispiness.
- Heat adjustments: Experiment with slightly higher temperatures or more roasting time. But be cautious, as almonds can quickly go from toasted to burnt.
- Use a wire rack: Roasting on an oven-safe wire rack allows better air circulation. The result is a more evenly roasted and crispier batch of almonds. Choose a rack with small gaps to keep the nuts secure.
Serve your roasted almonds with style
Roasted almonds can enhance a variety of dishes with their flavor and texture. Let’s have a look at some ideas:
- In salads: Enhance green salads with the added crunch from roasted almonds.
- Breakfast topping: A crunchy twist to morning oatmeal or yogurt can be achieved with chopped roasted almonds.
- Baking ingredient: Use chopped toasted almonds when topping cookies, bars, and cakes to add crunch.
- Savory garnish: Give soups, stews, or pasta an appealing crunch with a sprinkle of roasted almonds, a great alternative to croutons.
- Almond butter: Use toasted almonds to create a rich and flavorful butter. Their enhanced taste and aroma make a significant difference.
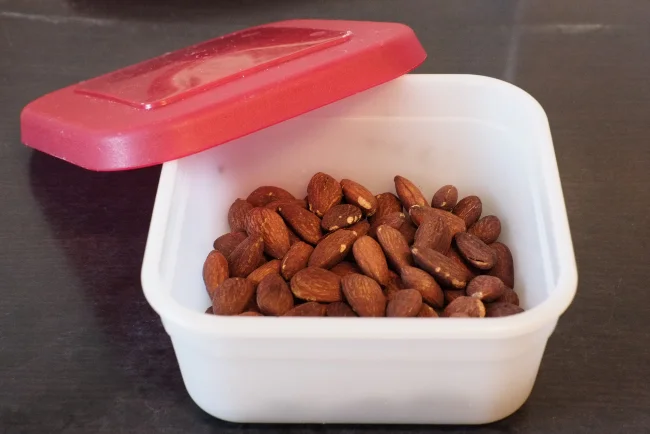
How to Store Roasted Almonds
Proper storage is crucial for keeping roasted almonds fresh and delicious. To best preserve their flavor and crunchiness, store them in airtight glass jars or plastic containers with tight-fitting lids. Resealable bags are also a good option.
Shelf Life and Quality Considerations
For home-roasted almonds, I recommend avoiding pantry storage. The refrigerator and freezer are much better options for preserving freshness and quality. They can last up to a year in the fridge, and their freshness extends even further when stored in the freezer. Always ensure the almonds are completely cooled before storing to prevent moisture buildup.
It’s important to note that pan-roasted almonds typically have a shorter shelf life compared to oven-roasted ones. This is due to the oil used, which can accelerate rancidity, especially when exposed to air and light.
Additionally, over time, even when stored correctly, the quality of roasted almonds may gradually decline. After about six months, they may start to lose some of their flavor and become harder. Although still safe to eat, they might not taste as fresh as they did initially.
Serving After Storage
When consuming the almonds, check for freshness, especially if they’ve been in storage for an extended period.
Finally, allow them to reach room temperature before serving. This enhances their taste and texture, making them more enjoyable than if eaten right away.
For more detailed information, including tips on maintaining freshness and preventing rancidity, check out our comprehensive guide on how to store almonds.
Conclusion
Toasting almonds at home is a rewarding culinary journey that allows you to fine-tune their flavor to your personal taste. By choosing to do it yourself, you have the opportunity to work with the freshest, top-quality ingredients, creating exceptionally flavorful snacks.
Getting started is straightforward: choose fresh nuts and decide between dry roasting in the oven or oil roasting in a pan. Each method has its charm, capable of producing crispy almonds tailored to your taste.
Once you find your favorite approach, you can play around with different seasonings and create unique recipes. The simplicity and versatility of almond roasting offer endless culinary possibilities.